Asset Tools by 3D Models - SCA
A downloadable Blender Add-on
Asset Tools - Blender Add-on
DESCRIPTION:
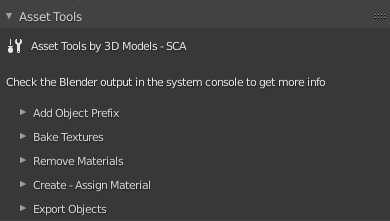
Asset Tools is a set of tools that will help you in the process of creating 3D assets, it has the following tools:
- Add Object Prefix
- Bake Textures
- Remove Materials
- Create - Assign Material
- Export Objects
INSTALLATION:
- Go to “Edit > Preferences > "Add-ons", then click on “Install…”
- Select the .zip file and press "Install Add-on"
- In the search bar search for "AssetTools" and enable it
- Save your preferences
USAGE NOTES AND INSTRUCTIONS:
- Add-on license: GPL-2.0
- You can see the add-on in the window area "Properties > Render Properties" in the panel "Asset Tools"
- It's highly recommended to open Blender with your system console to get more info and create a copy of your .blend file
- Before press any button you must select some objects, the objects can be part or a piece of other objects
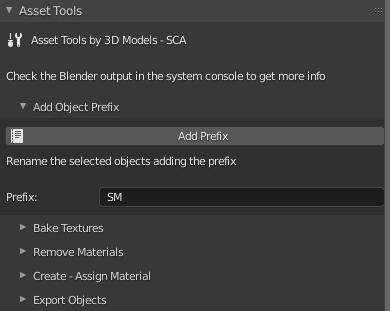
- Add Object Prefix With this tool you can rename the selected objects adding a prefix
- Select some objects
- Enter the prefix in the field "Prefix", you don't need to add '_'
- Press the button "Add Prefix" Example:
- If your object name is "Cube" and you add the prefix "SM" then your object will be renamed to "SM_Cube"
- Note: The prefix is important for the rest of tools, so be sure to specify it
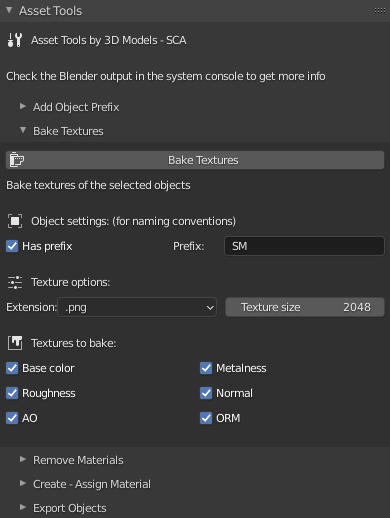
- Bake Textures With this tool you can bake the textures of the selected objects
- Your materials must have a Principled BSDF node setup with the same name
- The properties of the Principled BSDF for Base Color, Metallic and Roughness must be through a node, the node can be an image texture, Mix RGB node or RGB node
- The selected objects don't need to share the same materials but them need share the same UV map
- The name of the textures will be the same of your first object selected
- Select some objects
- Mark "Has prefix" if your selected objects have prefix and enter the prefix in the "Prefix" field, this is for naming conventions since your baked textures will have the name of your object without prefix
- Choose an extension (.png or .jpg), and set the texture size (min 512, max 8192)
- You must select the textures to bake, you can select all, but if you only select ORM you have to bake Metalness, Roughness and AO first
- Press the button "Bake Textures"
- You have to wait the process to finish, to get more info you need to open Blender with your system console
- Your textures are stored in the "Textures" folder in the same directory as your .blend file
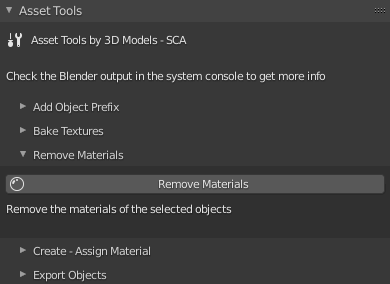
- Remove Materials With this tool you can remove all the materials of the selected objects
- Create a copy or backup of your .blend file before proceed
- Select some objects
- Press the button "Remove Materials"
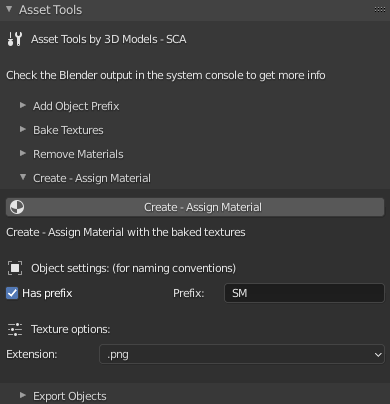
- Create - Assign Material With this tool you can create - assign a unique material for your selected objects and probe the result of the baked textures, or just to create a material with textures nodes
- Create a copy or backup of your .blend file before proceed
- You need the previous step "Remove Materials" and/or the step "Bake Textures"
- The name of the material will be the same of your first object selected
- Select some objects
- Mark "Has prefix" if your selected objects have prefix, enter the prefix in the "Prefix" field, and select an extension, this is to searh for your baked textures so be sure you specified it correctly (in any case the tool will create a material with the setup if your baked textures are missing)
- Press the button "Create - Assign Material"
- If you press the button "Create - Assign Material" but you dont have all your textures baked you can repeat the step "Remove Materials", then go to "File > Clean Up > Unused Data Blocks" and press again the button "Create - Assign Material"
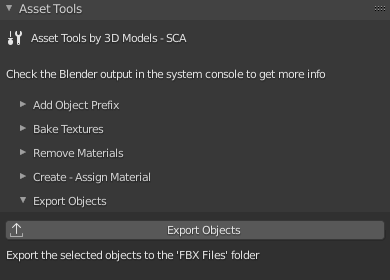
- Export Objects With this tool you can export the selected objects in the FBX file format
- The name of the FBX file will be the same of your first object selected
- Select some objects
- Press the button "Export Objects"
- Your FBX file is stored in the "FBX Files" folder in the same directory as your .blend file
HELP AND SUPPORT OR DOUBTS:
Contact me: 3dmodels.sca@gmail.com
- Help and support or doubts with any of my products:
-
If you have any problem or doubt with any of my products,
or if you require any product in an older version of the game engine please contact me:
Add as subject: The name of the product and the game engine you use
-
If you have any problem or doubt with any of my products,
or if you require any product in an older version of the game engine please contact me:
- 3D modeling or programming:
-
You can contact me if you want my services as 3D modeler or programmer:
Add as subject: Project and the game engine you use
- Or you can get my services on Fiverr
-
You can contact me if you want my services as 3D modeler or programmer:
Purchase
In order to download this Blender Add-on you must purchase it at or above the minimum price of $8.99 USD. You will get access to the following files:
Leave a comment
Log in with itch.io to leave a comment.